Automation
Automation lets you build no-code workflows that react to events in the CRM — a lead is created, a stage changes, a payment succeeds — and automatically run a chain of actions like sending a message, updating a lead, or waiting before the next step. It's a visual, drag-free canvas where you add a Trigger at the top and chain Actions below it.
How to Create a Workflow
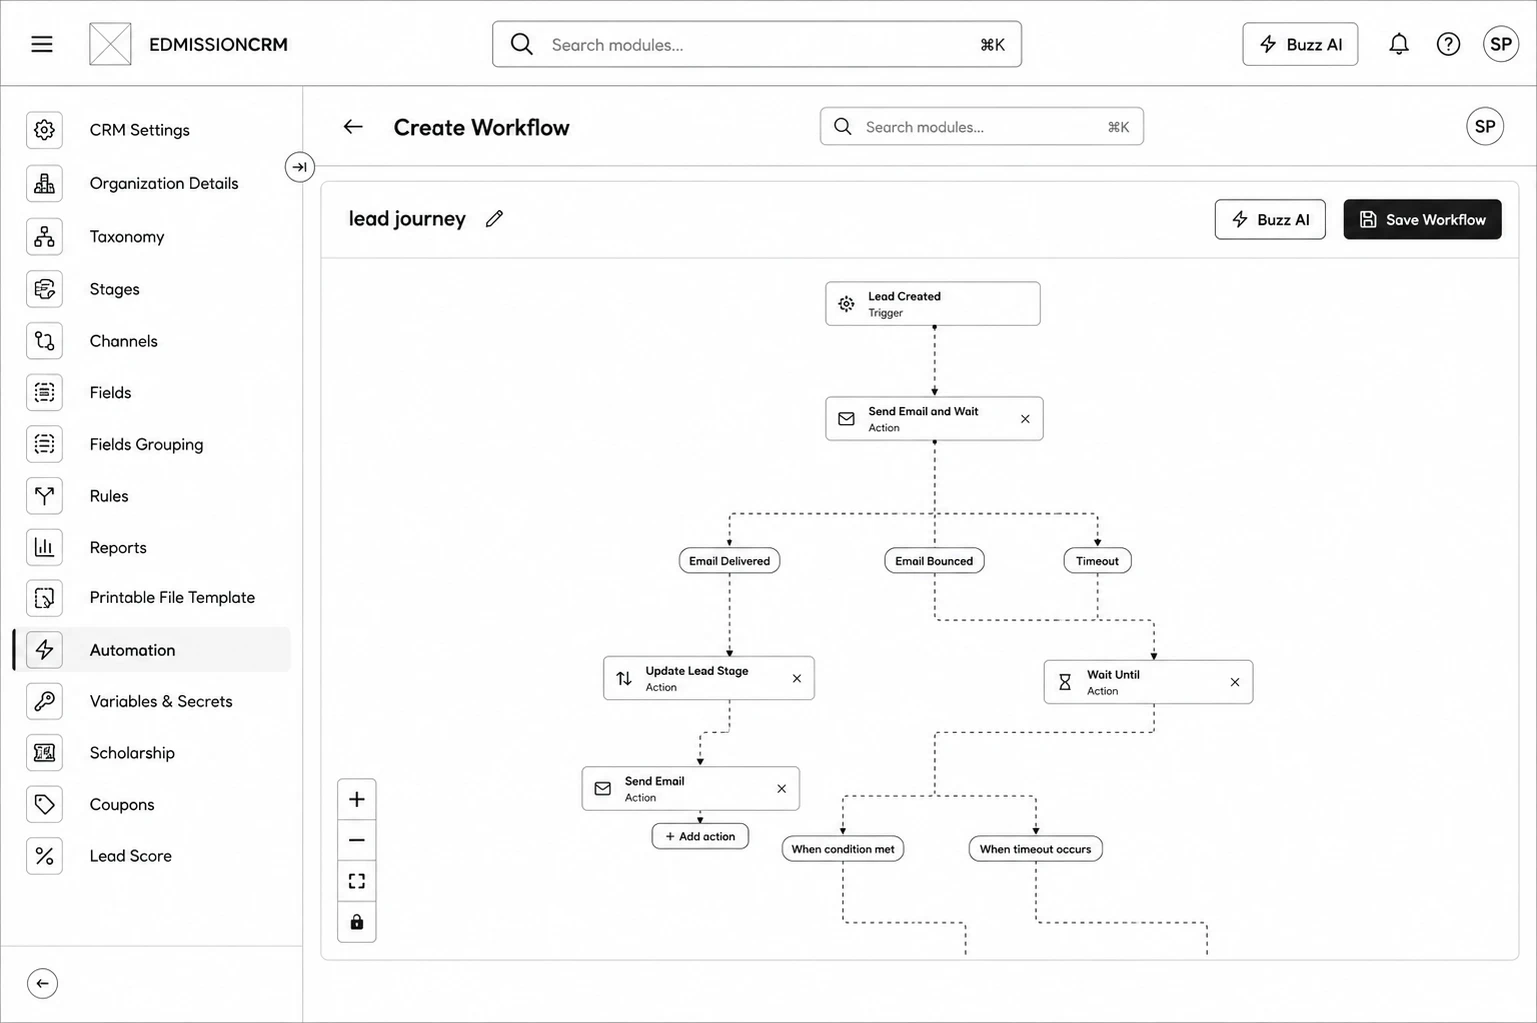
Step 1: Go to Automation from the sidebar and click Create Workflow.
Step 2:In the panel that opens, enter a Workflow Name and Description, then continue — this opens the visual builder canvas.
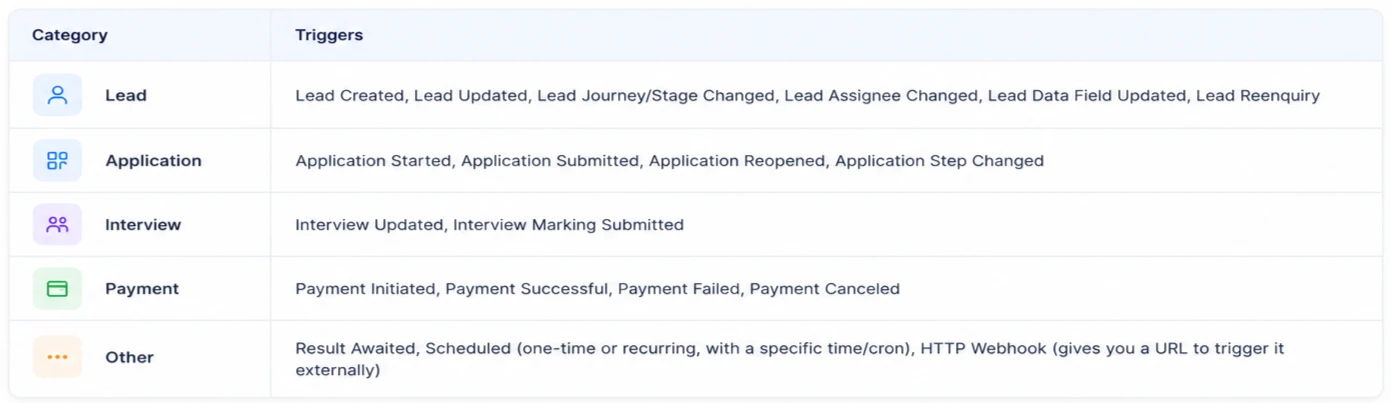
Step 3: Click Add Trigger on the trigger box and choose what should start the automation (see Trigger types below), then configure it.
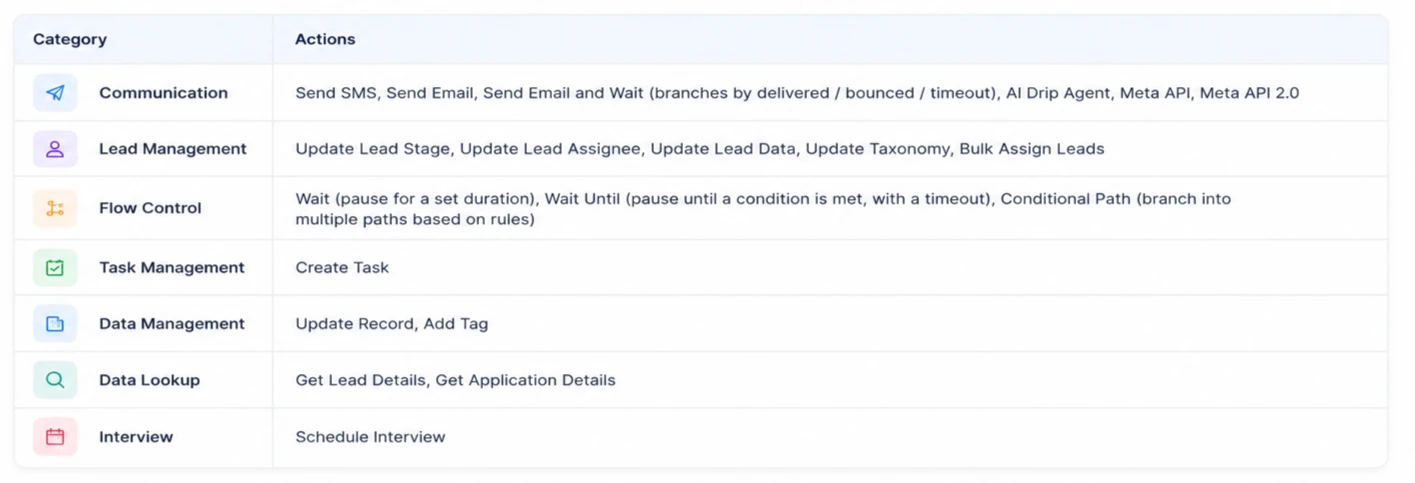
Step 4: Click Add Action below the trigger and choose what should happen (see Action types below).
Step 5: Keep clicking Add Action below each step to chain more actions in sequence.
Step 6: Click Save Workflow to save your changes.
Trigger Types (what starts a workflow)
Action Types (what the workflow does)
Viewing Execution History
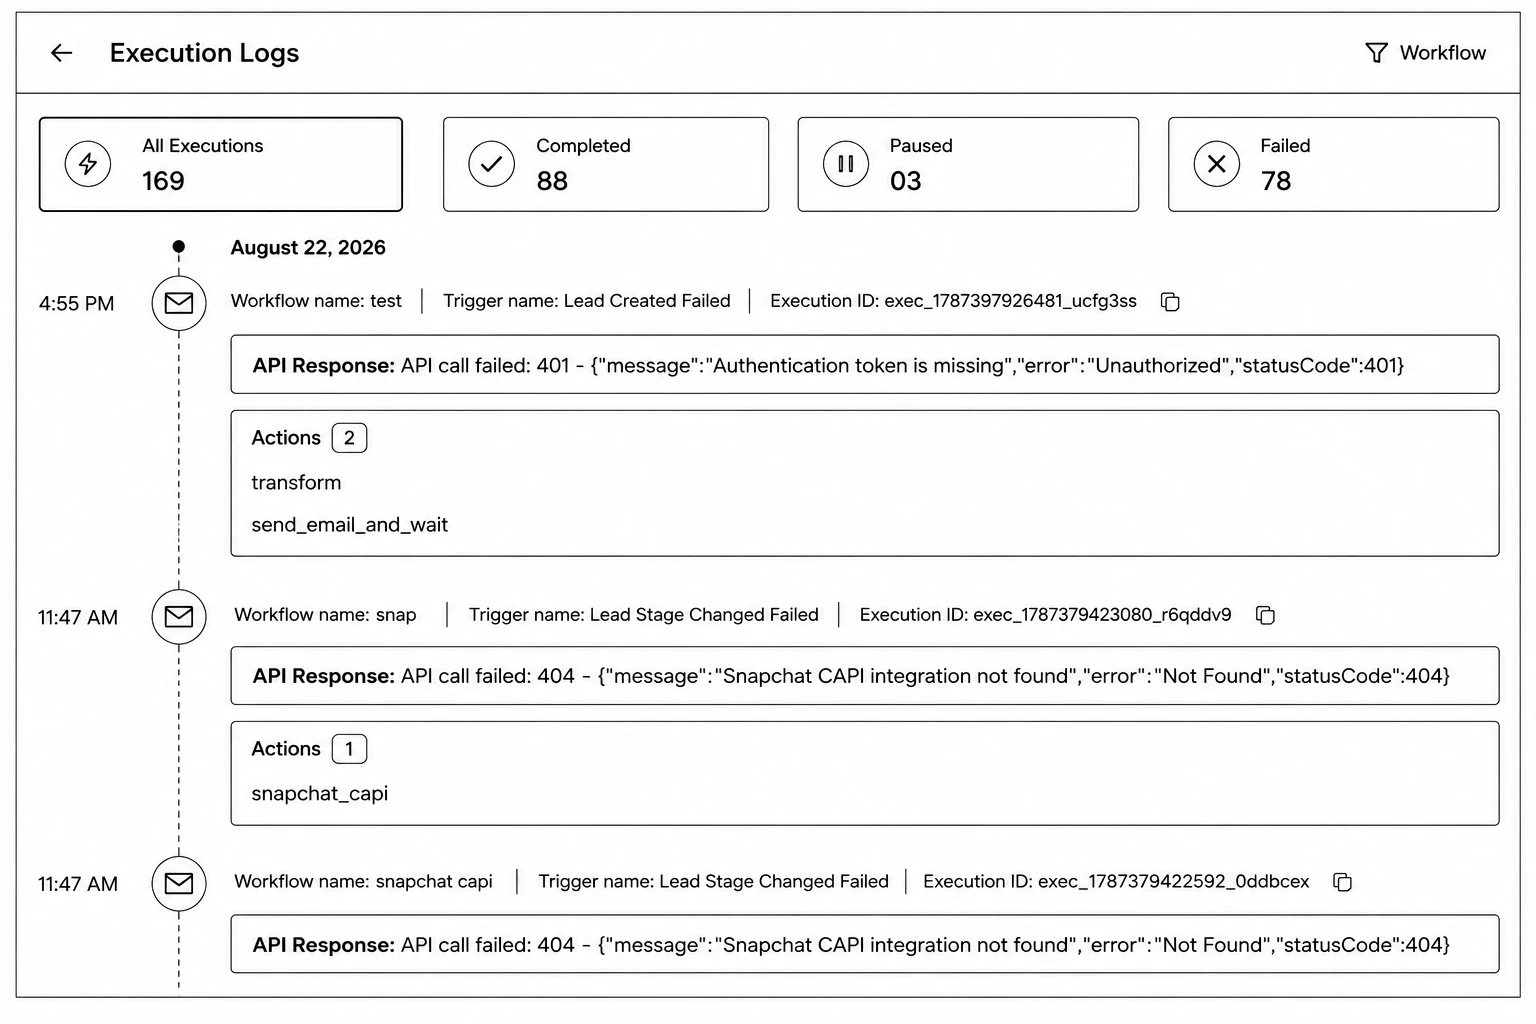
Click Execution Logs (from the list page, or the toggle inside the builder) to see every time a workflow ran — filter by workflow, and view All Executions, Completed, Paused, or Failed, with a step-by-step timeline of what each action did and how long it took.