Chatbot
The Chatbot module lets you set up an AI/rule-based chatbot for your website or WhatsApp that greets visitors, answers questions, captures lead information, and can hand off to your team. It has two connected pieces: the Chatbot itself (its look, behavior, and AI settings) and Chat Flows (the guided conversation scripts it can follow).
Chat Flows & Conversations
Setting Up a Chatbot (Admin Portal)
What You Can See
The Chatbot Management list shows every chatbot as a card with its name, a channel badge (Web or WhatsApp), Updated On date, and Active/Archived status. Filter using the Active / Archived tabs.
How to Create a Chatbot
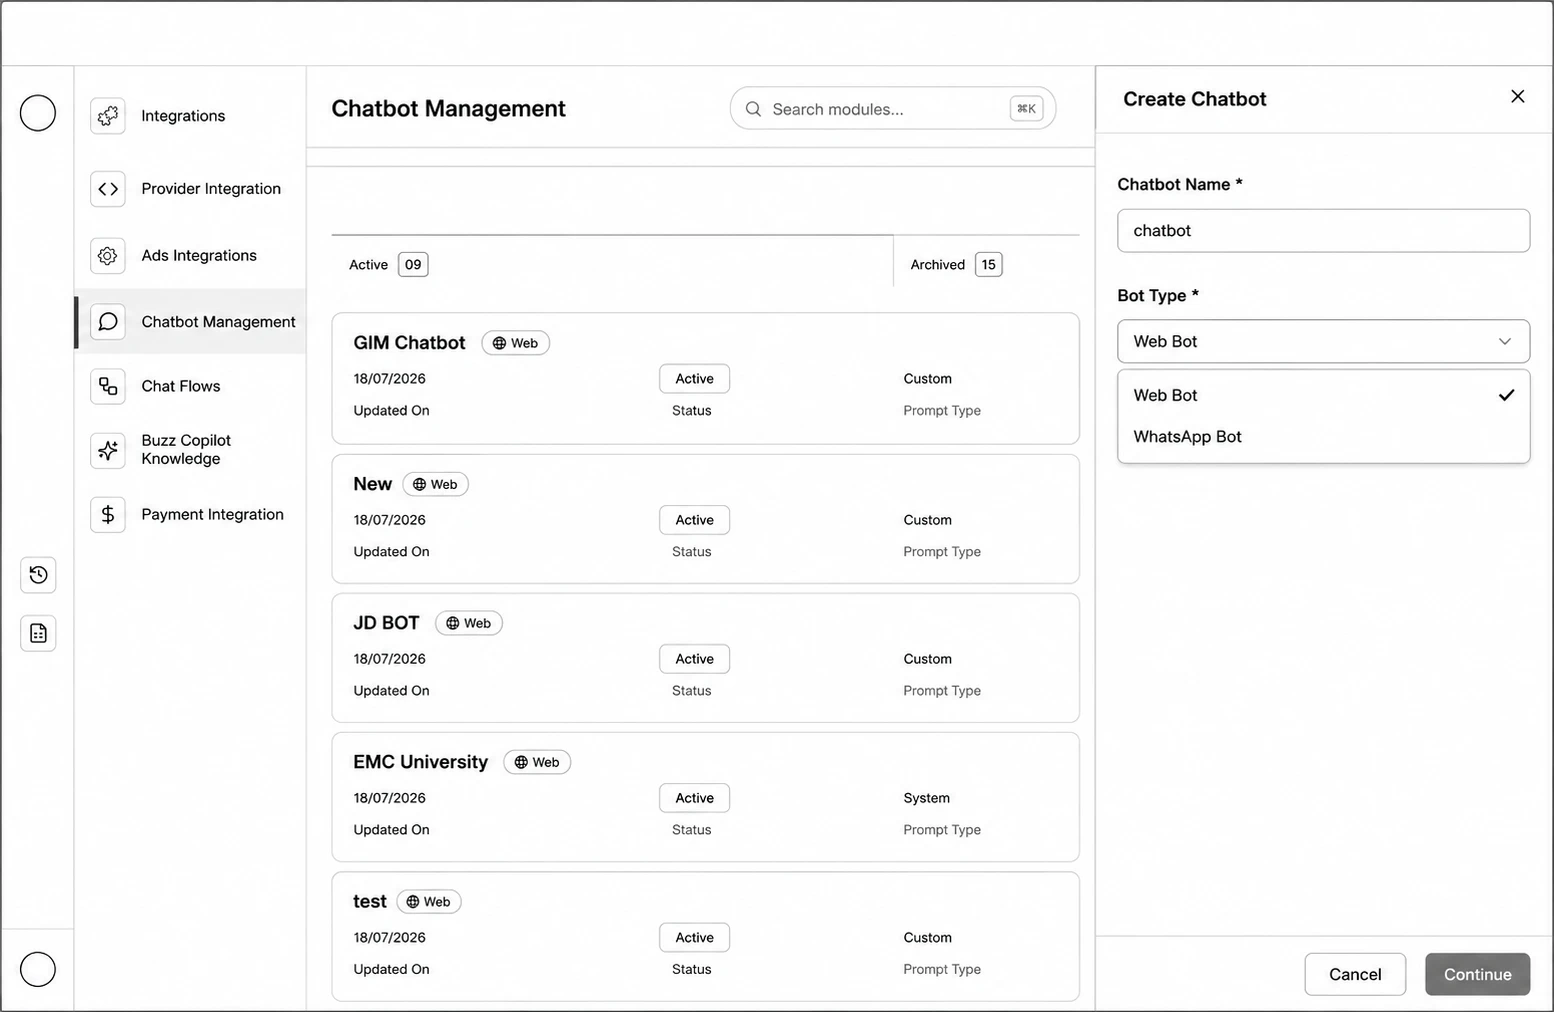
Step 1: Go to Chatbot Management from the sidebar and click Create Chatbot.
Step 2: Enter a Chatbot Name (e.g. "NYU Lead Capture Bot").
Step 3: Choose the Bot Type — Web Bot or WhatsApp Bot. (This cannot be changed later.)
Step 4: Click Continue — you're taken straight into the chatbot's configuration page.
Tab 1: Chatbot Experience
- Name and University Name
- (Web only) Website Domain — where the bot will be embedded
- Greetings — the bot's opening message
- (Web only) Optional popup message on the chat icon, auto-open on page load, and an intro video (URL, title, subtitle, autoplay)
- Topic Suggestions — up to 10 quick-start topics shown to visitors
- (Web only) Chatbot Color, Font Color, Alignment (Left/Right Bottom), and a Display Picture (preset avatar or a 32×32px uploaded logo)
- A live Preview panel on the right shows the widget as you configure it.
Tab 2: AI Context
- Prompt Configuration — pick a saved system prompt or customize your own.
- Conversation Mode — choose how the bot responds (see table below)
- Attached Chat Flows — checklist of your published flows (for Hybrid/Flows Only modes); unpublished flows are shown but can't be attached until published.
- Is Lead Gen Bot? (Web) — toggle Yes to turn this into a lead-capturing bot.
- Capture Course / Taxonomy? — optionally ask visitors to pick a course/program, and make it mandatory.
- University Context — add background material the AI can answer from: Upload PDF, Manual Context (typed text), or Add URL.
Tab 3: Fields to Capture / Lead Generation
- (Web lead-gen bots) Marketing Metadata — set the default Channel - Source, Medium, and Campaign Name attributed to leads captured by the bot.
- Lead Fields to Capture — pick which fields the bot should collect (including special options like "Phone with OTP verification" or "Email with OTP"), reorder them by dragging, and mark any as Mandatory.
Publishing and Embedding
- Click Save Chatbot to save your changes. Use the dropdown next to it for Preview.
- (Web bots only) Click Embed Code to get the snippet to paste into your website.
- Use the ⭐ Set as Default action on the list page to make a chatbot the one live on your website — this immediately replaces whatever bot was live before.