Fields
Fields are the individual pieces of information you capture about a lead — name, phone, course interest, budget, qualification, and anything else specific to your institution. Admins define fields once in the Admin Console, and those fields then automatically appear across the CRM: on the lead form, the Overview tab, the leads table, filters, and exports.
How to Create a New Field
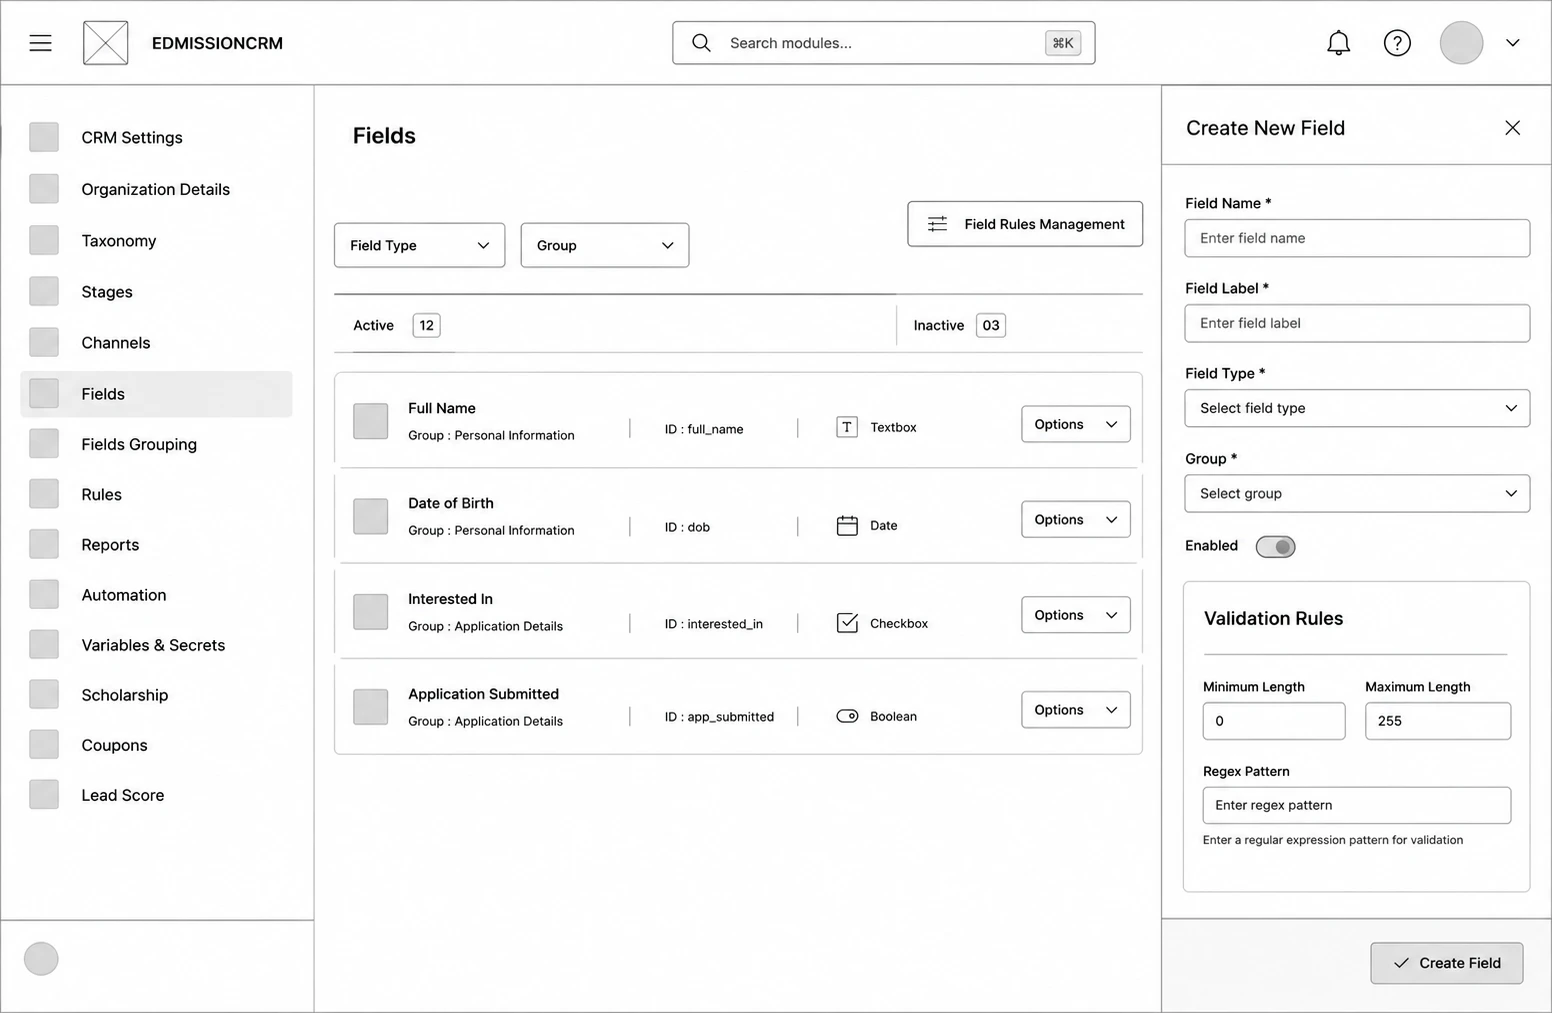
Step 1: Go to Fields from the sidebar (under CRM Settings).
Step 2: Click Create New Field at the top right. A panel slides in from the right.
Step 3: Enter a Field Name — the internal identifier. It auto-formats to lowercase with underscores (e.g. budget_range) and may only contain letters, numbers, underscores, and hyphens.
Step 4: Enter a Field Label — the human-friendly name shown to users (e.g. "Budget Range").
Step 5: Select a Field Type (see the list below).
Step 6: If the type is Dropdown or Multi-select Checkbox, add each choice under Options using the + button.
Step 7: Choose a Group — this decides which section the field appears in inside the CRM.
Step 8: (Optional) For Textbox, Number, or Date types, set Validation Rules (see below).
Step 9: Set the mandatory / edit toggles as needed (see below).
Step 10: Keep Enabled on and click Create Field.