Bulk Action Logs — Bulk Upload / Update
Tracks files uploaded to bulk-create or bulk-update leads.
How to Upload a File
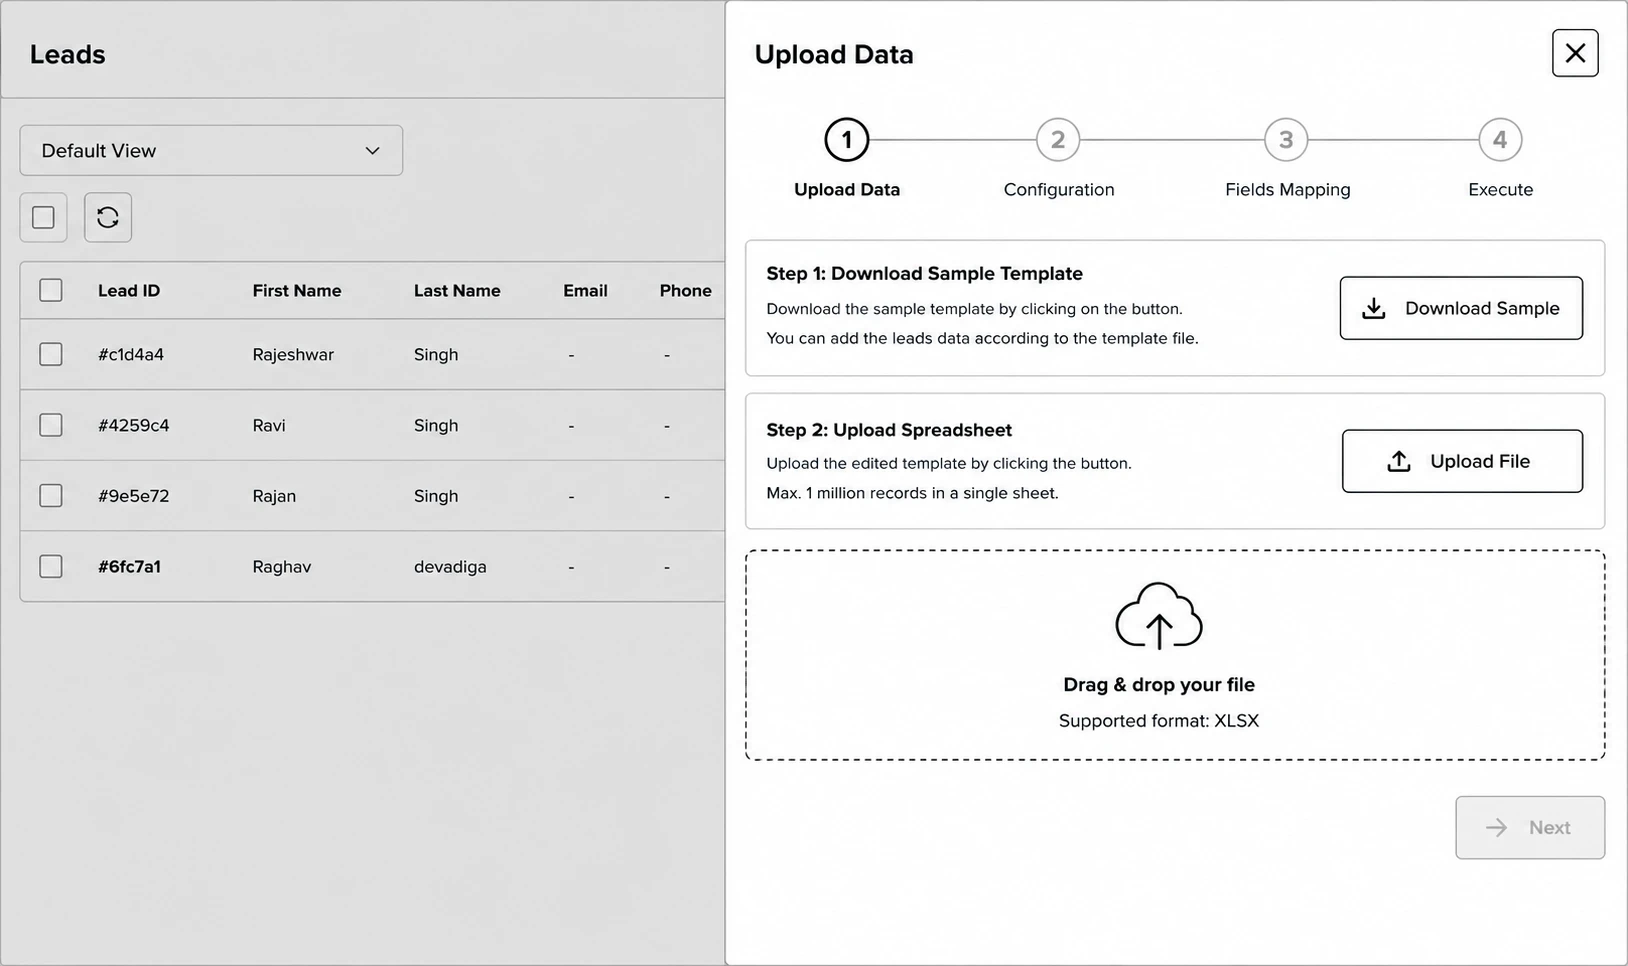
Uploading runs through a 4-step wizard — Upload Data → Configuration → Fields Mapping → Execute.
Step 1 (Upload Data): Click Download Sample to get the template, add your leads to it following the template structure, then click Upload File and choose the edited file — or drag and drop it directly onto the upload area. Only XLSX files are supported, up to 1 million records in a single sheet.
Step 2 (Configuration): Set the upload’s configuration (e.g. campaign/source details for the batch).
Step 3 (Fields Mapping): Map each column in your spreadsheet to the matching CRM field.
Step 4 (Execute): Review your choices and run the upload — it then shows up in the log list below as a new row.
What You Can See
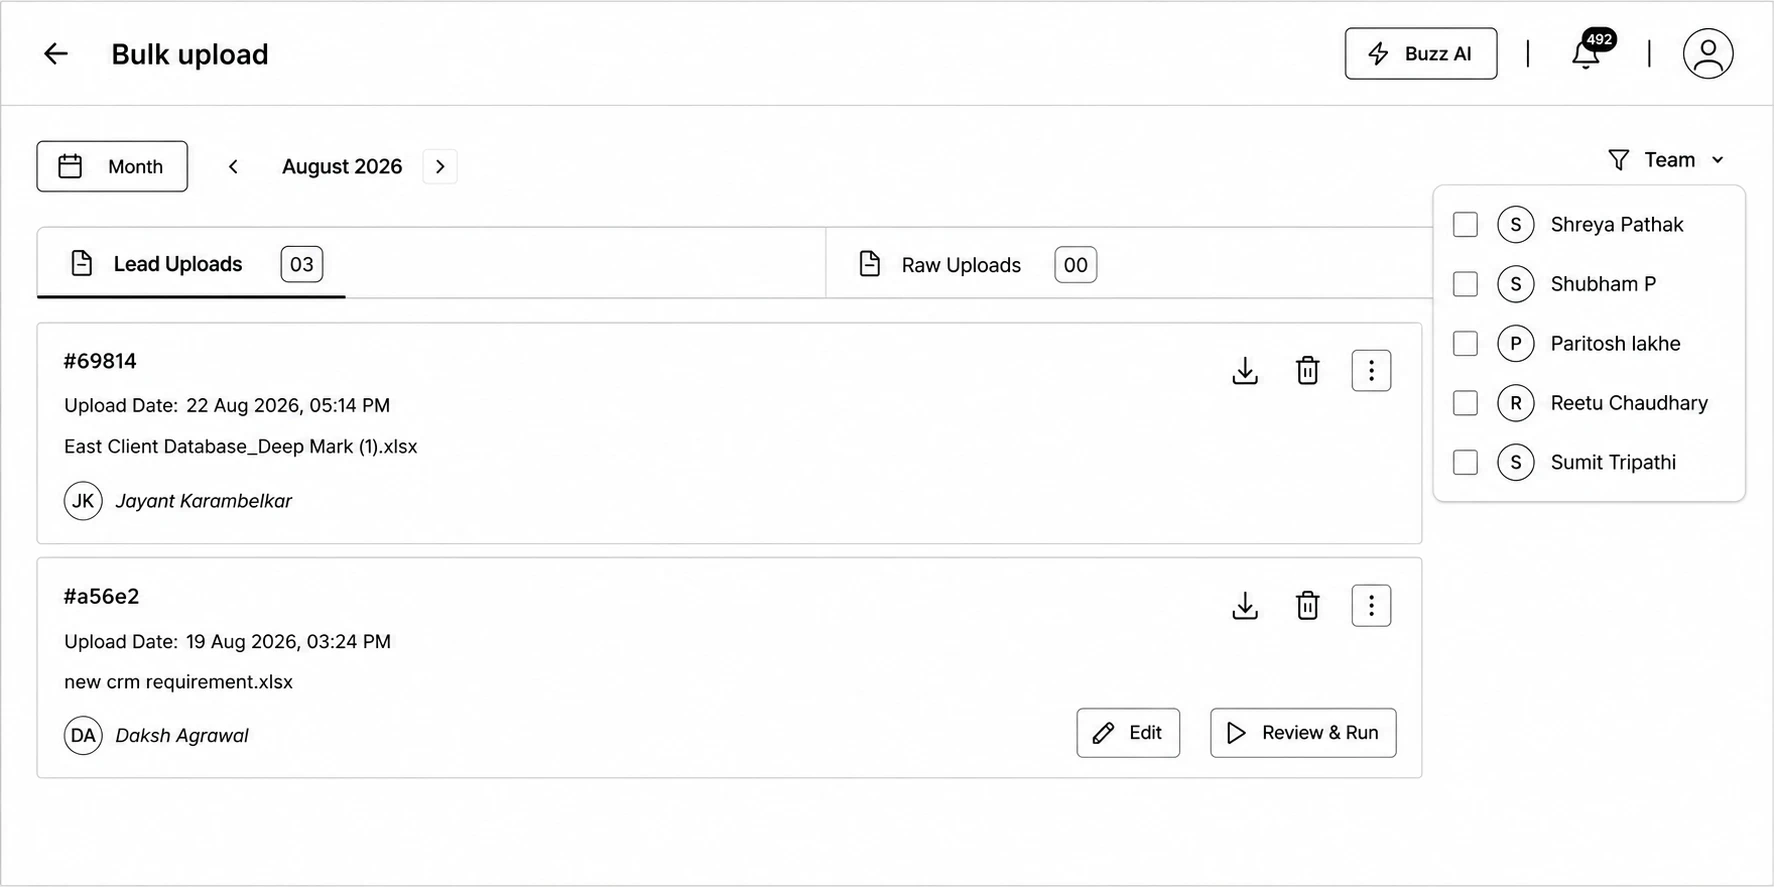
- Two tabs — Lead Uploads and Raw Uploads — each with its own count badge.
- Filter by date range and Team (which users’ uploads to show).
- Each row shows the Campaign name, Upload Date, File name, and once processed: Success <n> records and/or Failed Records: <n> with a download icon to get the error report (CSV) for the failed rows.
- While a file is still pending, use Edit to fix the mapping or Review & Run to process it — this button is disabled with a tooltip if something’s still missing.