Leads
Leads is the heart of the CRM — every prospective student your team is working with lives here. From the Leads list you can add, filter, and bulk-act on leads; from a lead's own page you can track its entire journey, communicate across channels, and manage everything about it.
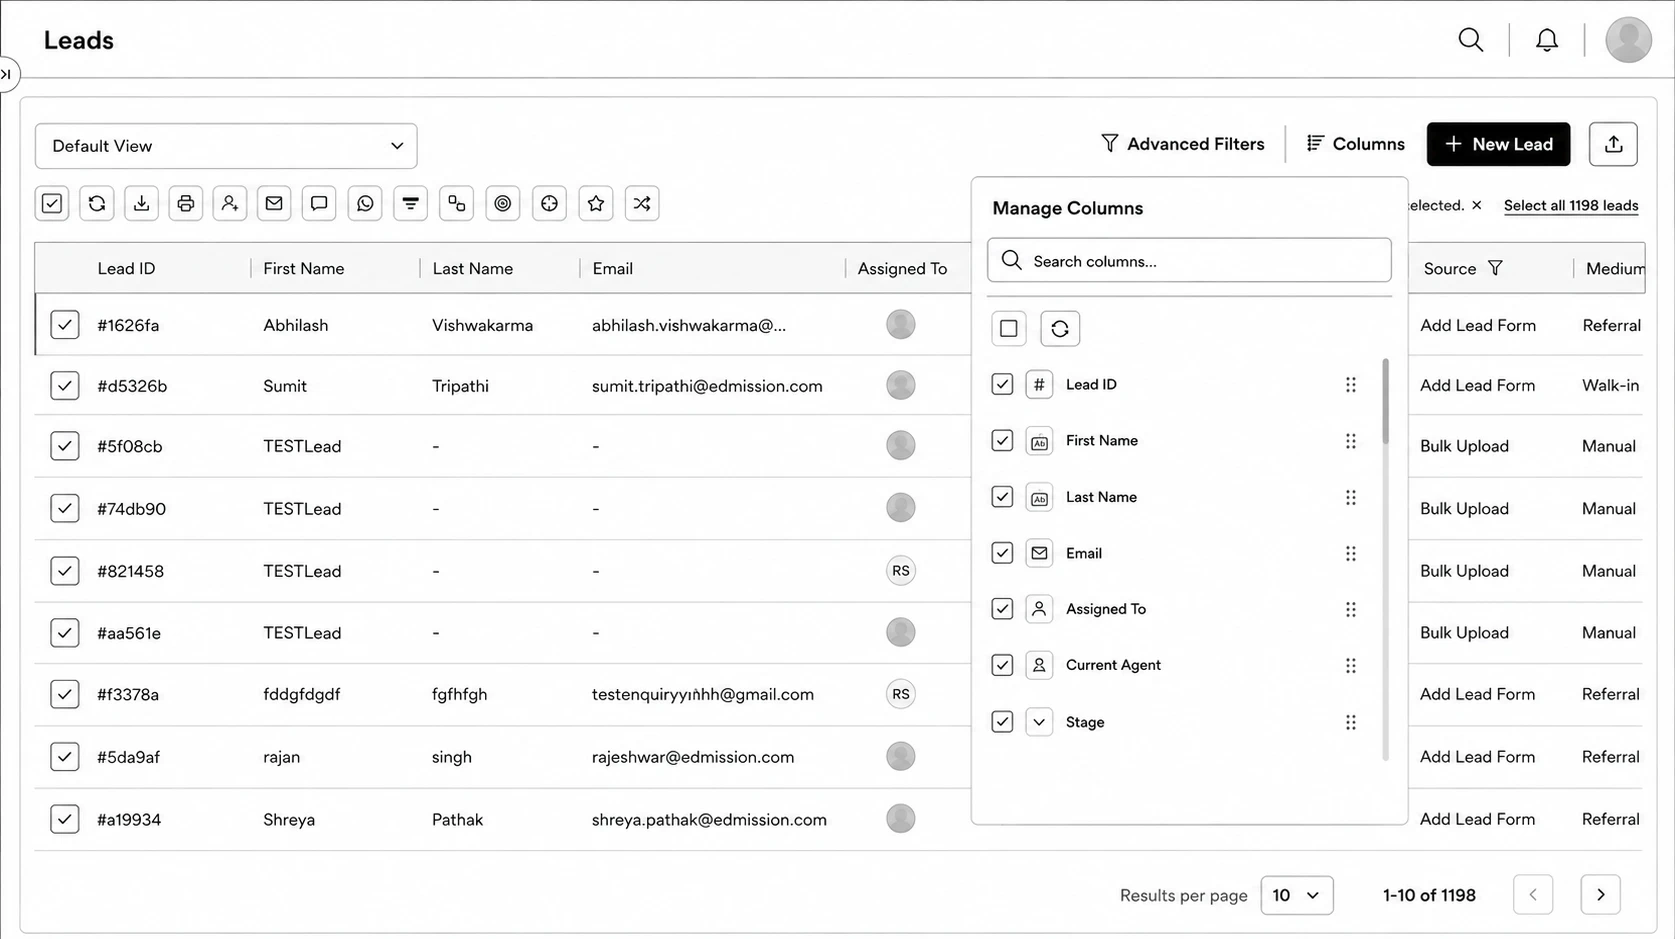
The Leads List
How to Add a New Lead
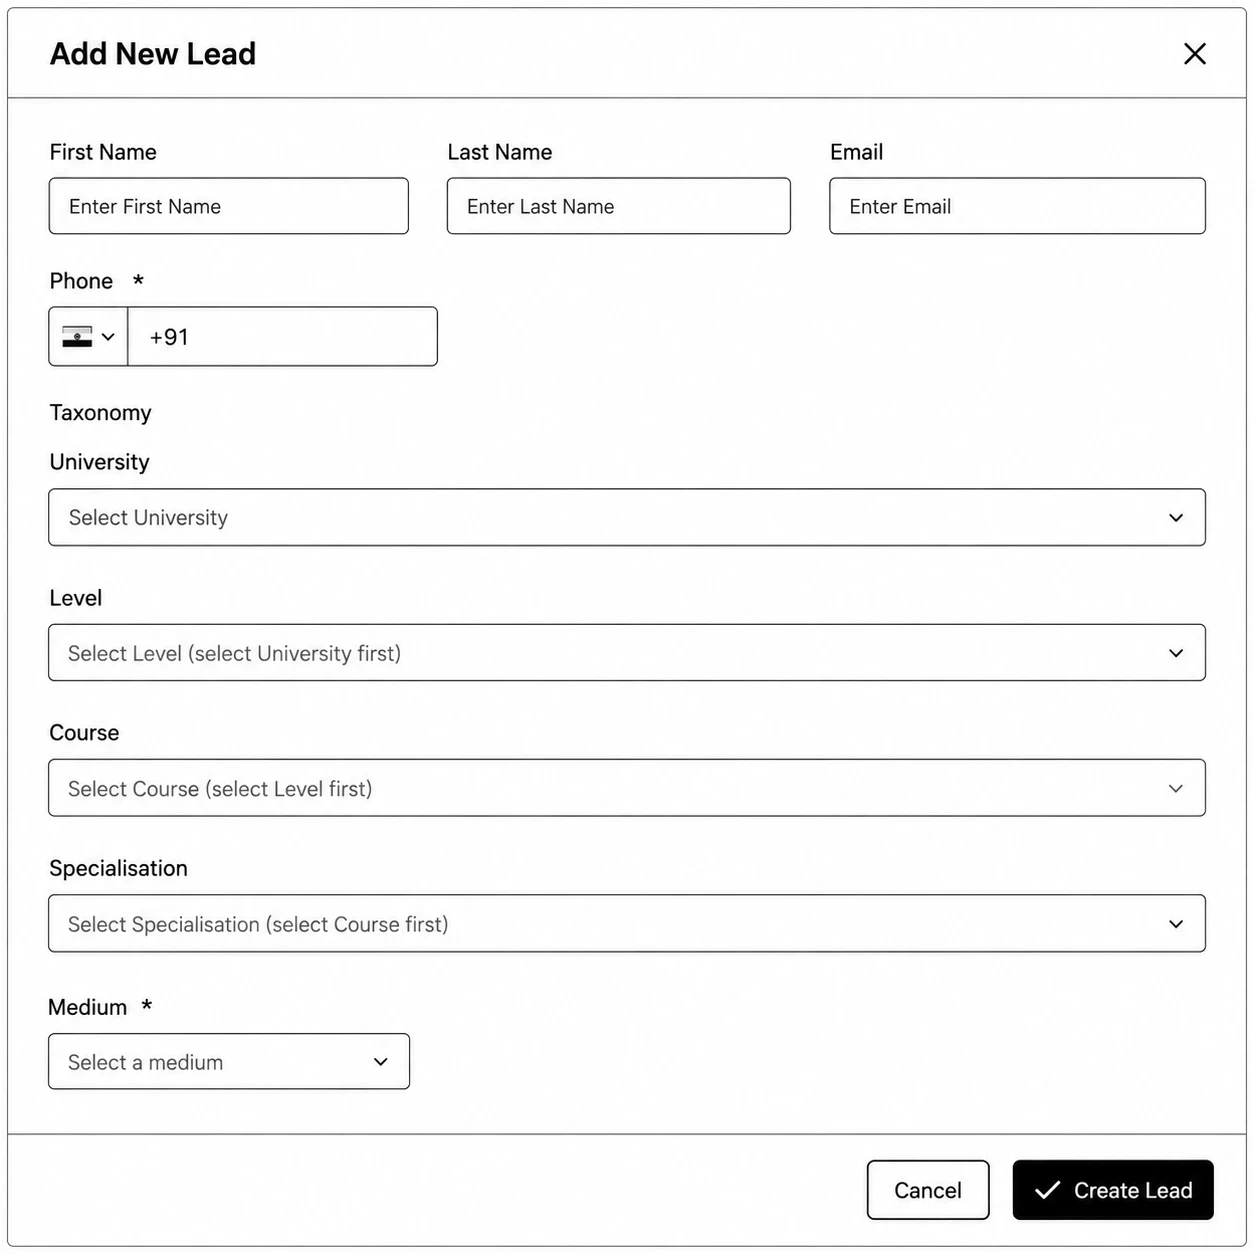
Step 1: Click New Lead at the top right.
Step 2: Fill in the fields shown — these are configured per organization in Admin's Quick Add settings, so the exact set varies, but every form always includes a required Medium field (how the lead came to you).
Step 3: Click Create Lead.
The Lead Detail Page
Opening a lead shows a set of sections (some only appear depending on your org's permissions/features):
Key Actions Available from the Lead's Header
- Email, WhatsApp, Call, SMS — open the respective send panel.
- Tasks — quickly add a task.
- Edit (pencil) — opens Edit Lead Fields.
- AI Summary — opens Buzz Copilot's summary of this lead (if enabled).
- Assigned to and Current Agent — searchable dropdowns to reassign the lead.
- Transfer to Lead Journey (Raw Leads only) and Push Lead to Integration.
- The stage badge next to the lead's name — opens Change Lead Status.
- If the lead has related leads, an Associated Leads dropdown appears; a Re-enquiry badge shows if this lead has come back after a previous journey.
Editing a Lead
There are two ways to update a lead's information:
Method 1: Inline (per section)
- On the Overview tab, click the pencil icon next to any section heading (e.g. Personal Information) to edit just that section.
Method 2: Full Edit Panel
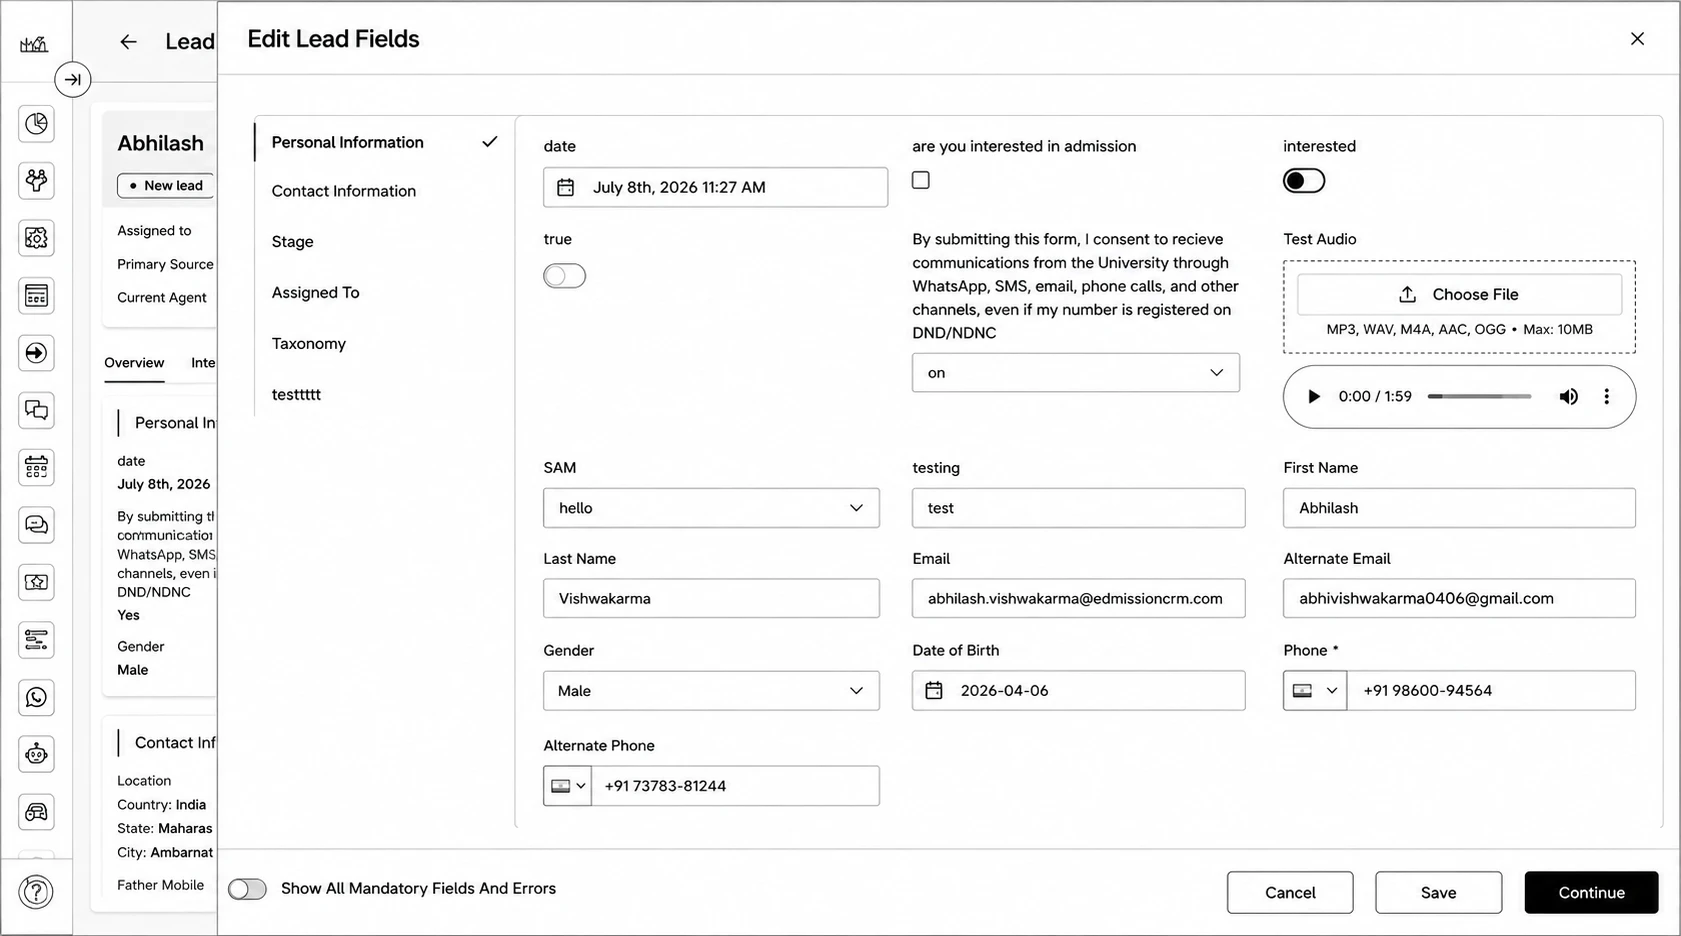
- Click the Edit (pencil) icon in the top-right toolbar to open Edit Lead Fields.
- Use the left-side tabs to move between field groups — including a Stage tab to change the lead's stage from the same panel.
- Turn on Show All Mandatory Fields And Errors to see every required field that's still missing across all groups.
- Use Previous / Continue to move between sections, and click Save to save your changes.